

How Do I Set The Photo Size On Mt Iphone 7 Camera?
If you have whatsoever of the newer iPhones, you have probably noticed that when you lot accept a moving-picture show with the photographic camera, it always has black bars on either side of the image. The iPhone screen has different aspect ratio than the photo and therefore the epitome doesn't fill up the unabridged screen.
For someone like me, this is just really an annoyance. Yes, there are advantages to the way Apple does it, which I will explain below, merely it is even so frustrating that I can't relish a full widescreen shot on my iPhone.
Luckily, there are a couple of ways you tin take and view your already taken photos in widescreen format on the iPhone. In this post, I'll show y'all how to edit photos so that they can exist widescreen and how to accept a photo in widescreen, though the latter option comes with some caveats.
Aspect Ratios
Before we get into the details, let's try to sympathize why photos taken on the iPhone will have black bars on either side of the photo like shown below:
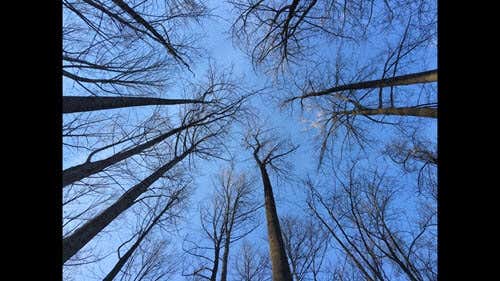
The iPhone takes photos with an attribute ratio of 4:three. Why? Well, apparently that is the preferred ratio in still photography because it captures more pixels in the picture and is the preferred format for print, etc. If they were to utilize a 16:9 ratio for photos, then you wouldn't be able to capture every bit much in each shot.
Have you lot ever noticed that when y'all switch from photograph to video on the iPhone, the camera zooms in? That is considering Hard disk video is shot at the 16:9 aspect ratio and therefore fills up the entire screen. The downside is that the shot has to be cropped and the field of view is considerably less.
In my opinion, Apple should have added an pick to take 16:9 photos also and just given a warning to users that the resolution would be less than the max resolution possible with a 4:3 ratio pic. In my tests, a max resolution photo in 4:3 format from my iPhone 6S Plus was 4032 x 3024.
In iOS, at that place are 2 ways to get your photos into xvi:9 widescreen ratio: either by editing the photo or by taking a picture while you are taking a video. If you edit a four:3 photograph and catechumen it to 16:9, the resulting resolution is 4032 ten 2268. If you have a 16:9 photo while taking a video, the resolution ends up being 3840×2160.

So what does that mean? Basically, if you lot similar the widescreen format, merely continue taking photos in the standard 4:3 ratio and but edit them to xvi:ix at a subsequently indicate similar I did above. You lot'll have to crop the image a piddling fleck (acme-wise), but you'll get the highest resolution photo.
Widescreen Images on iPhone
OK, so now that yous sympathize the mechanics behind how the photos are taken and displayed on your telephone, let's talk about the two ways to get widescreen photos. The first way is the simplest, only it requires you to take a video.
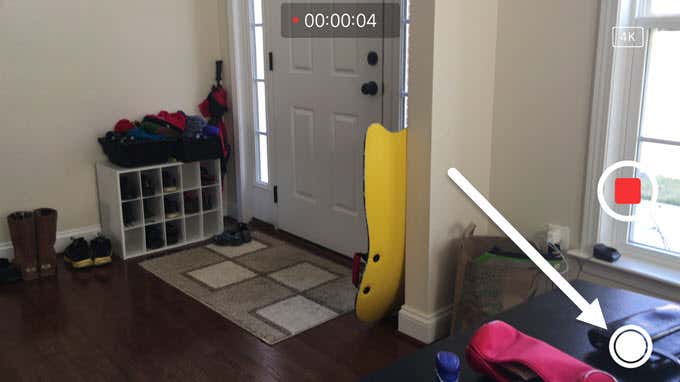
Open the Camera app and switch to video. When you showtime taking a video, y'all'll run into a white circumvolve appear at the bottom of the screen. This allows y'all to take a moving picture while recording a video.
At that place are a couple of reasons why this isn't the all-time way to get a widescreen photo. Firstly, you take to accept a video in order to take the widescreen shot. Manifestly, you can just delete the video later on, but who wants to keep taking videos every time they want to take a photo?
Secondly, similar I mentioned earlier, the resolution of the photo taken while in photographic camera mode is less than if you simply edited the iv:3 standard photograph. So allow's talk about how to edit a photo. Open the Photos app and tap on the photo you want to edit.
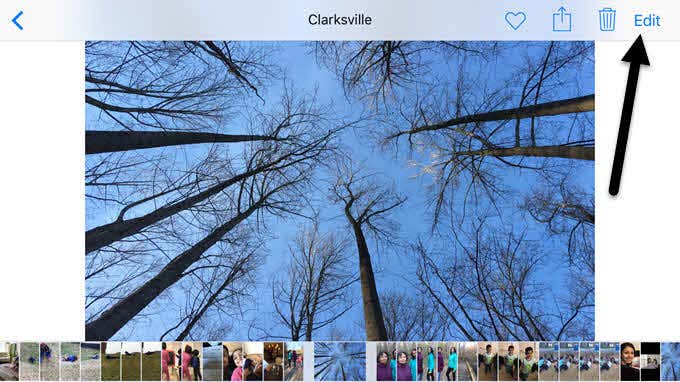
At the peak right, go alee and tap on the Edit link.

At present tap on the starting time icon towards the pinnacle, which is for rotating and cropping the image.
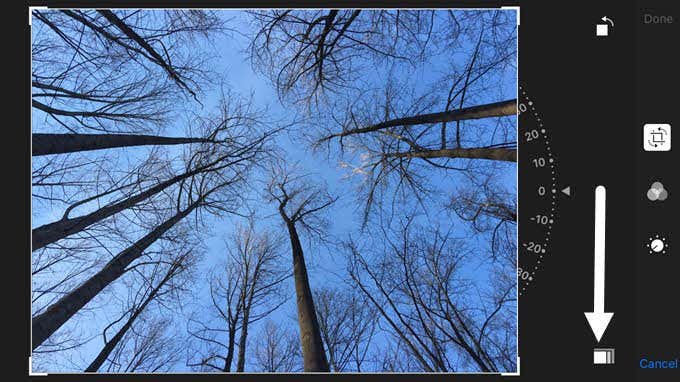
A few more icons will appear along with a wheel sort of thing that you tin can use to rotate the image. In our case, we need to tap on the aspect ratio push at the bottom, right side by side to the Cancel push.

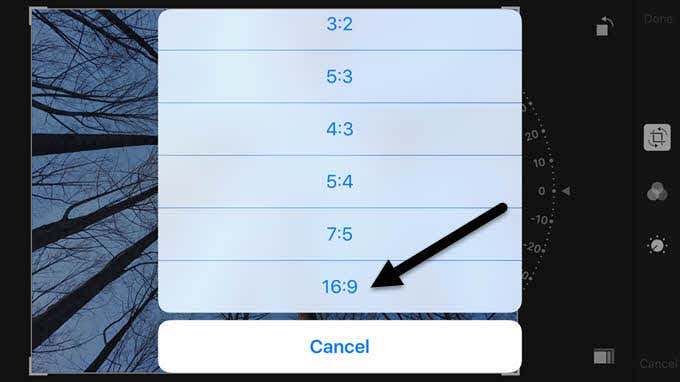
Now you'll go a popup with several unlike aspect ratios to cull from. Y'all need to scroll all the manner down to find the sixteen:9 ratio and tap on information technology.
Finally, yous have to crop the image past moving it around with your finger. The portion that is within the box is what will become your new widescreen photo.
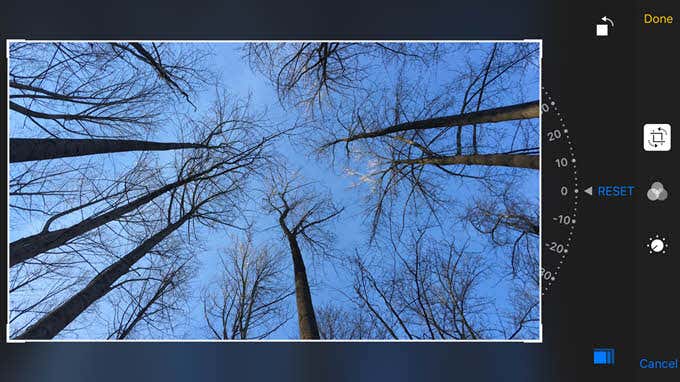
Tap Washed and your photo will at present be in widescreen format! That'south about all there is to it. Unfortunately, there is no mode to do this on a batch or gear up or photos in 1 go. You have to manually edit each photo that you want in widescreen format.
Camera+
If that sounds like too much of a hurting, and then you tin download an app from the App Store chosen Camera+. You tin can alter the shooting mode to 16:nine and accept the images automatically stored in the normal camera roll.
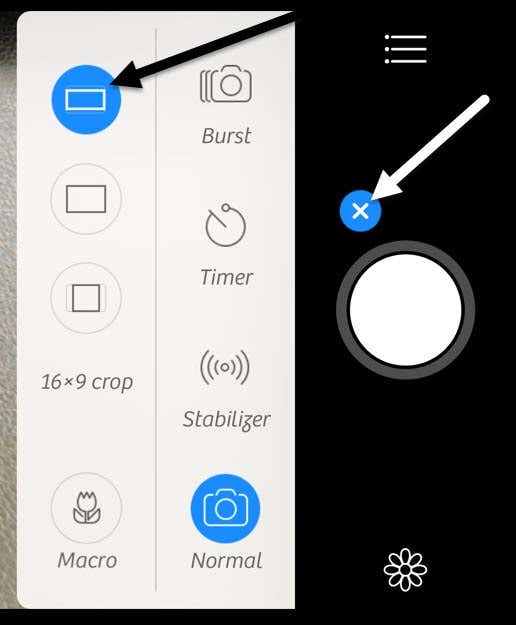
But tap on the petty plus icon next to the large white circle button and so choose the widescreen icon in the menu that pops out. To relieve images to your camera roll, tap on the niggling hamburger icon (3 lines), then tap on AutoSave and choose Camera Roll.
This is probably the easiest way to ensure that all your photos are taken in widescreen format without having to manually do anything else. The resolution of the image was also 4032×2268, so information technology'southward also the max resolution possible in that format. Yous can do a lot of other great stuff with that app, so it'southward totally worth the toll if you like widescreen images all the time.
Hopefully, these tips will help you understand and savour the photos you accept on your iPhone. If you accept whatever questions, feel costless to comment. Enjoy!
Do not share my Personal Information.
Source: https://www.online-tech-tips.com/smartphones/view-photos-widescreen-169-iphone/
Posted by: hardingcolood.blogspot.com
0 Response to "How Do I Set The Photo Size On Mt Iphone 7 Camera?"
Post a Comment